
Window films have become increasingly popular due to their numerous benefits, including enhanced privacy, energy efficiency, UV protection, and aesthetic appeal. Whether for residential or commercial use, installing window films is a smart investment that improves both function and comfort. However, achieving the best results requires understanding the complete process—from selecting the right type of film to proper application. In this article, we will guide you step-by-step through the process of installing window films to help ensure a smooth and successful experience.
Understanding Window Films
Before diving into the installation process, it’s essential to understand what window films are and the different types available. Window films are thin layers of polyester or vinyl applied directly to glass surfaces. They come in various styles and serve different purposes, such as solar control, decorative design, safety enhancement, and glare reduction.
Types of Window Films
Solar Control Films: These films reduce heat and UV rays, making interiors more energy-efficient and comfortable.
Privacy Films: Often frosted or tinted, they obscure the view from outside while maintaining indoor visibility.
Security Films: Thicker and more durable, they help reinforce glass against shattering or break-ins.
Decorative Films: Used mainly for aesthetics, these films can mimic etched glass or carry artistic patterns.
Anti-Glare Films: Ideal for offices or homes with screens, they reduce reflections and eye strain.
Choosing the Right Window Film
Choosing the right window film is crucial to ensure that it meets your needs and complements your space. The choice depends on several factors, including the purpose, the location of the window, the building orientation, and local climate.
Factors to Consider
Objective: Determine if your primary goal is privacy, heat reduction, safety, or style.
Window Orientation: South and west-facing windows receive the most sunlight and may benefit more from solar films.
Local Climate: In hot climates, heat-reducing films are beneficial, whereas cold regions may need films that retain heat.
Glass Type: Not all films are compatible with all glass types. Consult the manufacturer’s specifications to avoid damage.
Aesthetic Appeal: Choose a film that blends well with the building’s architecture and interior décor.
Tools and Materials Required
Before installing window films, gather the necessary tools to ensure a clean and efficient application. Here’s what you’ll need:
- Window film roll
- Spray bottle with a soapy water solution (baby shampoo and water)
- Squeegee
- Utility knife or precision blade
- Measuring tape
- Lint-free cloth or paper towel
- Hard card or plastic scraper
- Ruler or straight edge
- Ladder (for high windows)
Preparing the Window Surface
Preparation is one of the most critical steps when installing window films. Any dirt, grease, or residue can create bubbles and reduce the film’s effectiveness.
Cleaning the Glass
- Spray the window thoroughly with the soapy water solution.
- Scrape off dirt or paint with a razor blade or scraper.
- Wipe clean with a lint-free cloth to remove all moisture, dust, and debris.
- Repeat the process if necessary to ensure a spotless surface.
Measuring and Cutting the Film
- Measure the dimensions of your window, allowing for a 1-inch margin on all sides.
- Cut the film on a clean, flat surface using a straight edge and utility knife.
- Label the sides of the film if it has a specific orientation, such as a reflective surface.
Applying the Window Film
With preparation complete, you’re ready to start installing window films. It’s best to work in a dust-free environment and avoid doing the installation in direct sunlight to prevent premature drying.
Step-by-Step Application
1. Wet the Window
Spray the window surface generously with the soapy water solution. This creates a slip layer that allows the film to be adjusted during application.
2. Remove the Film Liner
Peel off the protective liner from the adhesive side of the film. As you do this, spray the adhesive side with the solution to prevent it from sticking to itself or attracting dust.
3. Place the Film on the Glass
Carefully place the film on the wet window, adhesive side facing the glass. Use your hands to position it roughly in place.
4. Adjust the Alignment
Slide the film into the correct position. The soapy solution allows it to glide easily until perfectly aligned.
5. Squeegee Out Air and Water
Starting from the center, use a squeegee to push out water and air bubbles toward the edges. Work slowly to avoid creases or folds.
6. Trim Excess Film
Use a sharp utility knife and straight edge to trim away any excess film along the edges of the glass.
7. Final Squeegee Pass
Make another pass with the squeegee to remove any remaining moisture or air. Wipe down the edges with a dry cloth.
Post-Installation Care
After installing window films, it’s essential to care for them properly to extend their lifespan and maintain appearance.
Drying Time
Allow the film to cure for at least 24 to 48 hours. In colder or more humid environments, this could take up to a week. Avoid cleaning or touching the film during this time.
Cleaning Tips
Once the film has cured, clean it gently with a soft cloth and mild soap solution. Avoid abrasive tools or harsh chemicals, as they can damage the film surface.
Common Mistakes to Avoid
Applying on dirty glass: Trapped particles can cause bubbles and reduce adhesion.
Skipping the soapy solution: Dry application can lead to poor positioning and trapped air.
Not trimming properly: Uneven edges can peel over time.
Working in direct sunlight: The film may dry too quickly, preventing adjustments.
Using harsh cleaning agents: These can scratch or discolor the film.
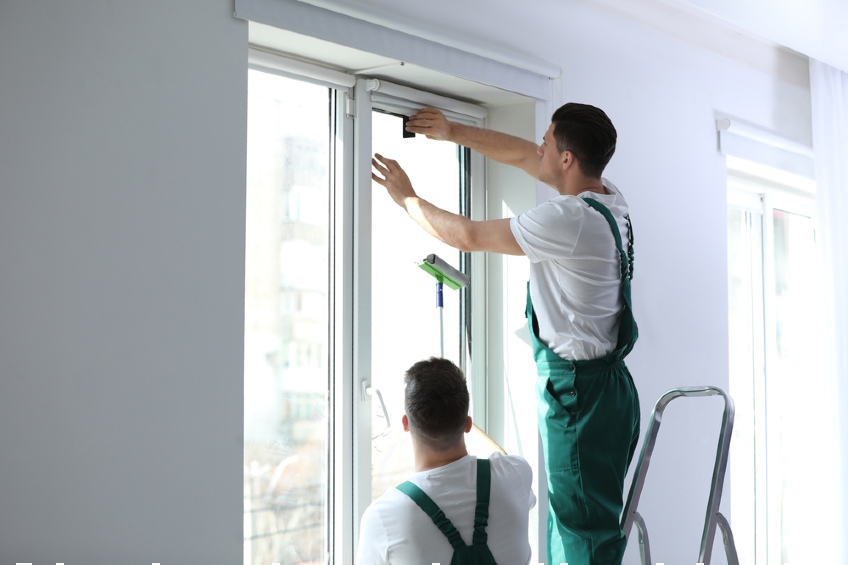
Professional vs. DIY Installation
While many homeowners successfully handle installing window films themselves, some situations call for professional help. Large windows, high-rise installations, or specialty films may require expert skills and tools.
Benefits of Professional Installation
- Guaranteed workmanship
- Access to commercial-grade materials
- Faster, cleaner application
- Warranty and aftercare services
Conclusion
Installing window films is a detailed process that requires careful selection, precise measurement, thorough preparation, and skillful application. When done correctly, the benefits are substantial—from improved comfort and security to enhanced visual appeal. Whether you’re a DIY enthusiast or considering hiring a professional, understanding each step will help ensure that your window film installation is smooth, effective, and long-lasting.


